
How to Design Amigurumi in 7 Steps in 2023 - Little World of Whimsy
 Curated from:
littleworldofwhimsy.com
Curated from:
littleworldofwhimsy.com
Ideas, facts & insights covering these topics:
10 ideas · 36 reads

Steps Of Amigurumi Design
- Get inspired
- Understand the building blocks
- Draw a sketch
- Crochet shapes that match the sketch
- Make a second version
- Get the pattern tested
- Type up & publish your design

1. Get Inspired
Start with a general idea. Then think of some small elements to add to your object or animal to make it fully yours and create some personality.
Your inspiration can come from anywhere. It can help a lot if you make a list of your ideas.

2. Understand The Building Blocks
All amigurumi can be broken down into a collection of basic shapes, on top of which there are some modifications. Make sure you know how to make a few of them!
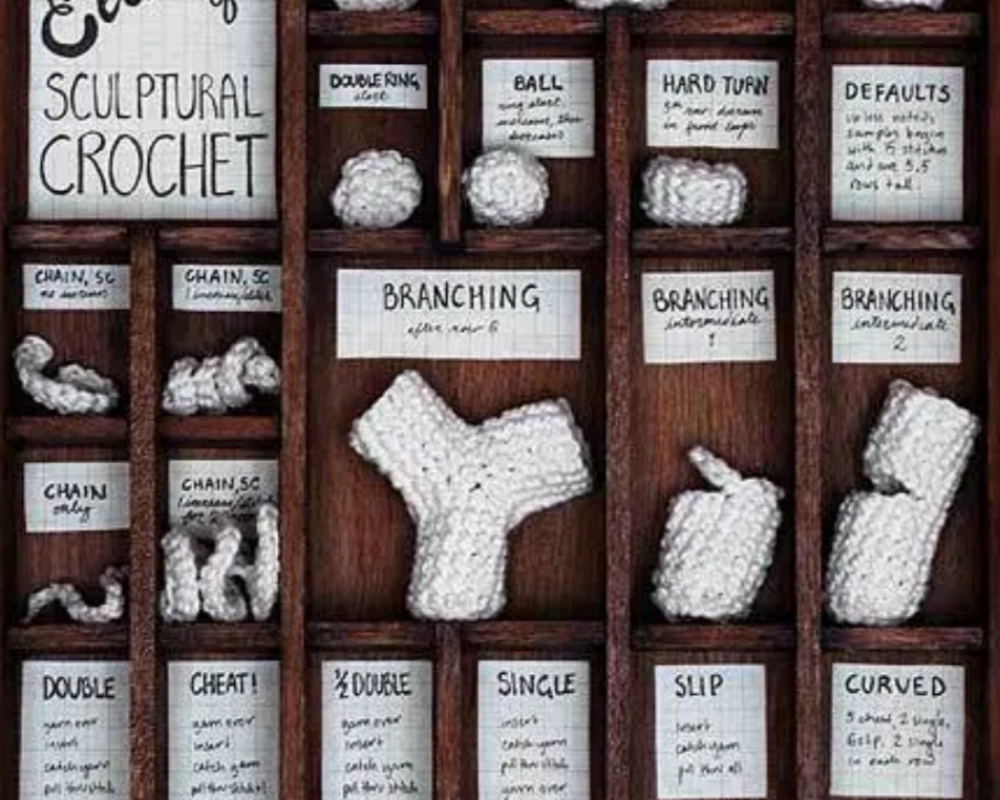
Basic Shapes
- Sphere (for head)
- Cylinders (elongated - legs, hands, tails; short & flattened - ears)
- Hemispheres (to make ears)
- Squares (clothes)
- Lines (hair, scarves)
- Circles (spots)
- Ovals (how? - work around a fondation chain!)
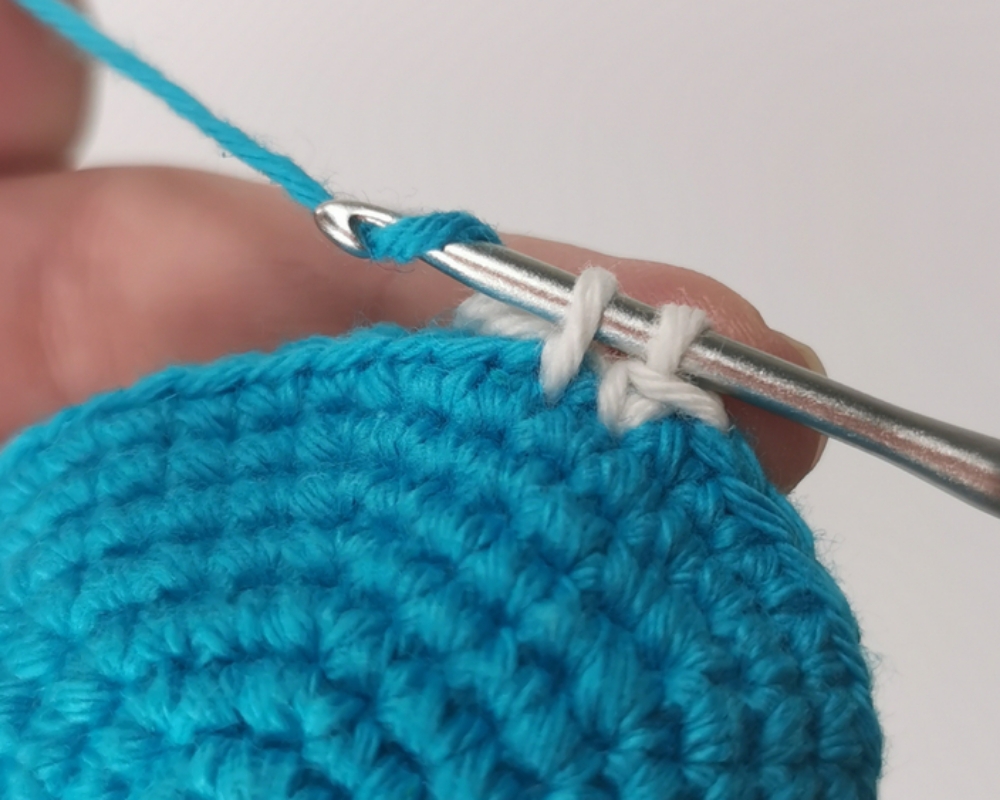
The purpose of this step is to get your idea down on paper in a way that you can visualize your amigurumi and begin to get a sense of its proportions. Using the basic shapes as building blocks, break your design down into spheres, cylinders, and lines in your sketch.
The most important details to incorporate are any elements that you want to crochet. During this process, you also need to think about how you’re going to actually crochet an element of your idea, and what shape you’re going to base it on, so that you can sketch the shape and size. If you don’t have a definite plan for how you’re go
Write down the exact steps that you’re taking on a piece of paper or Word document as you go along. Include the round/row number, number of stitches, increases or decreases, and total number of stitches at the end. You may create some kind of shorthand after a while, but it’s totally fine to write every single stitch down at first.
Make sure to check that all the numbers make sense as you go along. This is why it’s important to note the total number of stitches, because you can easily do basic multiplication to check whether your pattern is internally consistent and also check against the actual
5. Make A Second Version
All that’s left is tying up loose ends.
If you've made several patterns and you're really confident, you can skip this step.
But if this is your first pattern, it’s really worth it to go back and check it yourself.
Pattern testing is the main way that I double check my patterns. Create your first draft on a Word or Google document and include the pictures you took along the way along with any extra instructions, making sure to include abbreviations you use and materials. (For the full breakdown of what I put in my amigurumi patterns, click here!)
You can find pattern testers by asking your friends or anyone you know who crochets and is willing to test your pattern for you. Alternatively, you can advertise on social media that you’re looking for pattern testers. Instagram is best for this and already has a

7. Type Up & Publish Your Design
Finalize your pattern by making any edits that your pattern testers brought up.
- Take a few more process photos
- Rearrange the order of construction
- Correct math mistakes
If you plan to publish your pattern, you should consider what platform you want to do it on (e.g. Etsy or your own blog) and whether you want it to be free or paid.

Congratulations !
You've just made your own amigurumi pattern! This is just the beginning of a beautiful journey - a lot more ideas are waiting for you to be designed.